DIY Painted Deer Skull

Leave a comment

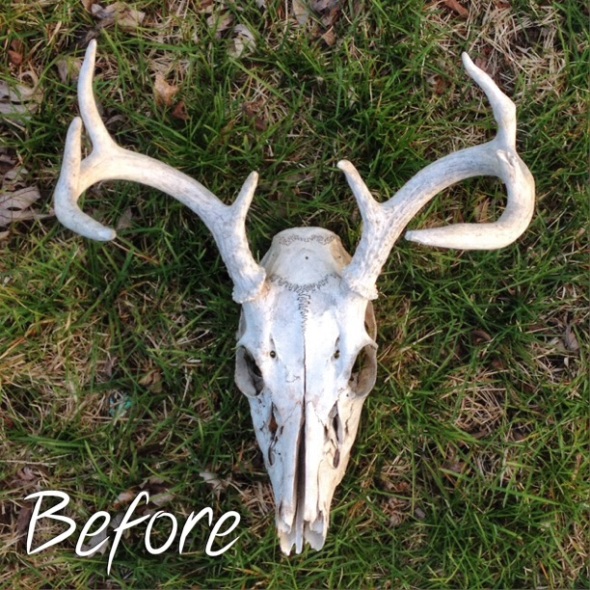
I recently came across some deer skulls on craigslist. The person was selling items that were found in old storage abandoned lockers that his father started mass purchasing. I quickly scooped them up for projects. When I picked them up, the man cautiously asked me what I wanted 4 skulls for, and I told him I planned on cleaning them up and hanging them on the wall as decoration.

This is seriously such an easy color project to implement and it looks amazing hanging out your wall.

  1. If the skull is free of soft tissue, simply brush off dust, hair, or any other debris.
  2. Buy one spray can of your color of choice – I went with lime green!
  3. Use well-ventilated area when spraying. I have a yard, so I placed the skull on a flattened cardboard box in the grass.
  4. Spray one side, let it dry for an hour and then flip and spray the other side. I recommend 2 coats.
  5. For hanging, drill a small hole on the back side, under the large hole (foramen magnum) near the top of the head. Then insert an eye hook screw, which can then be hung simply with picture hanger hardware.

Upcycled Mid-Century Book Shelf

Leave a comment

A few months ago I found this adorable mid-century shelf at a thrift shop for $25. But I wasn’t a huge fan of the sloppy reddish brown paint and I abhorred the old dated wall paper, so I decided to freshen it up.

  1. First, I ripped out the wall paper. There was a ton of old dried glue residue still adhering so I used my small electric sander to easily sand away the adherent.
  2. After giving the shelf a wipe down to remove dust, I decided to spray paint it with Rust-Oleum in an heirloom white color. For maximum coverage, I ended up needing 4 cans, so I recommend going with a small can of paint, if you take on a similar project.
  3. Next I decided to paint the backboard with a pop of color: orange. Cream and orange look beautiful together and I wanted to give this shelf a more retro midcentury feel.
  4. I taped off the edge around the back board and then used a 4-inch cabinet/door roller to cover main areas and a small paint brush for the edges.
  5. After letting this dry, I removed the tape, touched up areas where some bleeding had occurred.
  6. Finally I used a spray sealant as a fixative, but I will end up covering the whole shelf in a 1-2 layers of polyacrylic ( my favorite sealant – it doesn’t yellow furniture over time) to ensure the paint doesn’t scrape off with use.

Now it’s time to fill this babe with vintage chotskies and lovely books!

Finished Shelf

Finished Shelf

Before & After

Etched Pint Glasses: Merry ReX-mas & Holiday Grumpy Cat

Leave a comment

It’s that time of the year again. We’re all striving to find someone a neat gift that doesn’t cost a ton of money but is unique and cool at the same time. Something that says, “I put a little thought into this and didn’t just walk into an Urban Outfitters and grab a tchotchke from the checkout line while waiting to buy myself a sweater.”

My glasses are personally designed by myself and at only $10 apiece, they’re budget-friendly. Using an acid-etching technique, the design is permanent and will never wash away or chip like enamel decals.

https://www.etsy.com/listing/171645292/merry-rex-mas-etched-pint-glass

Merry ReX-mas and Holiday Grumpy Cat

https://www.etsy.com/listing/171645292/merry-rex-mas-etched-pint-glass

Merry ReX-mas Pint Glass

https://www.etsy.com/listing/171645292/merry-rex-mas-etched-pint-glass

Merry ReX-mas Pint Glass

https://www.etsy.com/listing/171686574/holiday-grumpy-cat-etched-pint-glass

Holiday Grumpy Cat Pint Glass

Buy handmade!!